Содержание
- 1 Windows 10 Update Error 0x800703f1 [FIX]
- 1.1 How to fix Windows 10 update error 0x800703f1
- 1.2 Solution 1 – Roll back malfunctioning drivers
- 1.3 Solution 2 – Use the SFC and DISM tools
- 1.4 Solution 3 – Remove Nvidia drivers and Nvidia GeForce experience
- 1.5 Solution 4 – Check your antivirus
- 1.6 Solution 5 – Disable Windows Defender
- 1.7 Solution 6 – Run Windows Update Troubleshooter
- 1.8 Solution 7 – Restart all Windows Update components
- 1.9 Solution 8 – Perform a clean reinstall of Windows 10
- 2 Top 5 Solutions to Fix Windows 10 Update Error 0x800703F1 and Make System Error Free!
- 3 Ошибка 0x800703f1 windows 10
- 3.1 Устранение ошибок Windows Update, вызванных повреждением хранилища компонентов
- 3.2 Этап 1 – восстановление поврежденного хранилища компонентов
- 3.3 Восстановление без установочного диска
- 3.4 Восстановление с помощью установочного диска
- 3.5 Этап 2 – проверка целостности системных файлов
- 3.6 Этап 3 – установка обновления
- 3.7 Что такое обслуживание Windows и зачем оно нужно
- 3.8 Преимущества встроенного восстановления компонентов Windows
- 3.9 Windows Vista и Windows 7
- 3.10 Windows 8 и новее
- 3.11 Консольные средства для восстановления компонентов
- 3.12 Цель проверки (работающая система и образы)
- 3.13 Проверка и восстановление хранилища
- 3.14 Источник компонентов для восстановления
- 3.15 Примеры команд PowerShell
- 3.16 Результаты проверки и восстановления
- 4 How to fix Windows 10 Update Error 0x800703f1 on Windows 10?
- 5 Непредвиденная ошибка при восстановлении системы 0x800703f1
Windows 10 Update Error 0x800703f1 [FIX]
Even though Windows 10 is on the road to becoming the most used OS in the world, Microsoft receives various complaints from users, and most of them are related to the Update feature and privacy.
The users counted over 30 different update issues that need to be addressed. One of those affects peripheral devices, USB ports and it goes by the code 0x800703f1.
It’s connected with Service registration failure and leads to update stuck. Until Microsoft sorts this issue out, we have a few valuable advice and workarounds for you.
How to fix Windows 10 update error 0x800703f1
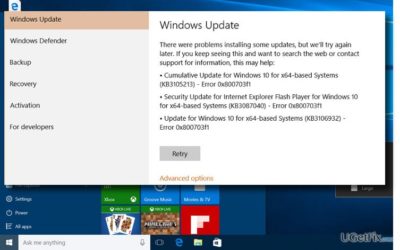
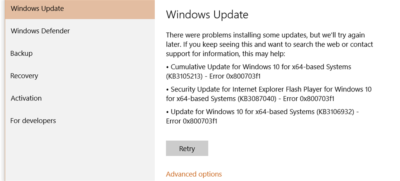
Windows Update error 0x800703f1 can appear and prevent you from installing certain updates. Speaking of this error, users reported similar issues:
- System Restore error 0x800703f1 – This error can also appear while using System Restore, and if that happens, be sure to scan your system for file corruption and check if that helps. You can also try to solve the problem by disabling your antivirus.
- 0x800703f1 Windows 8 – According to users, this error can affect older versions of Windows as well. Even if you’re using Windows 8 or 7, you should know that most of our solutions can be applied to them as well, so feel free to try them.
Looking for the best tool to fix Windows update issues? This guide will help you decide which one to get.
Solution 1 – Roll back malfunctioning drivers
Drivers are the core of this issue. While most of the drivers functioned seamlessly before the upgrade, Windows 10 somehow corrupted them.
So, your first step is to try and roll back drivers to their previous state. Follow these instructions:
- Right-click Start and open Device Manager.
- Find problematic devices or peripherals on the list.
- Right-click and open Properties.
- Open Driver tab.
- Click Roll Back driver.
In case that hasn’t changed anything, move on to the next step.
Solution 2 – Use the SFC and DISM tools
If you keep getting error 0x800703f1, the issue might be caused by file corruption. This can occur for various reasons and cause your Windows installation to become corrupted.
However, you can fix the corruption problems simply by running an SFC scan. To do that, follow these steps:
- Press Windows Key + X to open Win + X menu. Now choose Command Prompt (Admin) from the list. If Command Prompt isn’t available, you can also use PowerShell (Admin).
- When Command Prompt starts, enter sfc /scannow and press Enter.
- SFC scan will now start and try to repair your system. This scan can take about 15 minutes, so don’t interfere with it.
Once the scan is finished, check if the problem is resolved. If SFC scan didn’t fix the problem, or if you couldn’t start SFC scan at all, you might want to use DISM instead.
To use DISM to repair your computer, follow these steps:
- Press Windows key + X and run Command Prompt (Admin).
- Copy and paste the following command on the command line:
- DISM.exe /Online /Cleanup-image /Restorehealth
- In case the DISM can’t obtain files online, try using your installation USB or DVD. Insert media and type following command:
- DISM.exe /Online /Cleanup-Image /RestoreHealth /Source:C:RepairSourceWindows /LimitAccess
- Be sure to replace ”C:RepairSourceWindows” path of your DVD or USB.
After the DISM scan is done, check if the problem still persists. If the issue is still present, or if you couldn’t run DISM scan before, be sure to run it again and check if that solves the issue.
Need more info on DISM? Read this guide to learn more.
Solution 3 – Remove Nvidia drivers and Nvidia GeForce experience
Often your drivers can cause error 0x800703f1 and prevent you from updating your PC. According to users, this issue can be caused by Nvidia drivers.
If that’s the case, you need to remove both nVidia drivers and nVidia GeForce Experience from your PC.
There are several ways to uninstall Nvidia drivers and nVidia software, but the best way is to use uninstaller software. In case your not familiar with it, uninstaller software can remove any application from your PC.
In addition to removing the application, the uninstaller software will also remove all files and registry entries associated with it, so it will be as if the software was never installed.
If you’re looking for a good uninstaller software, we suggest you use IOBit Uninstaller. This tool is incredibly simple to use, so you should be able to remove any application with ease.
Once you remove Nvidia drivers and software, reinstall Nvidia drivers and check if that solves your issue.
Solution 4 – Check your antivirus
According to users, sometimes your antivirus can interfere with your system and cause error 0x800703f1 while trying to update your system.
If that’s the case, we advise you to disable certain antivirus features and check if that helps. In case the issue is still there, you need to completely disable your antivirus and check if that helps.
If the problem appears even with your antivirus disabled, you should consider removing your antivirus. Once you remove it, try to perform the upgrade again.
If removing the antivirus solves the issue, it might be a good time to consider switching to a different antivirus.
There are many great antivirus tools on the market, but the best is Bitdefender, so feel free to try it out.
50% of Windows users don’t use an antivirus. Don’t be one of them. Choose one from our list!
Solution 5 – Disable Windows Defender
If you don’t have a third-party antivirus on your PC, it’s rather ly that you have Windows Defender running in the background.
This is a solid antivirus software, and it most cases it won’t interfere with your system in any way.
However, few users reported that sometimes Windows Defender can lead to this issue. To fix the problem, it’s advised to disable real-time protection in Windows Defender.
This is rather simple and you can do it by following these steps:
- Press Windows Key + I to open the Settings app. Go to Update & Security section.
- Go to Windows Security in the left pane. In the right pane click Open Windows Defender Security Center.
- Select Virus & threat protection.
- Now click Virus & threat protection settings.
- Locate Real-time protection feature and turn it off.
After doing that, try to perform the upgrade again.
Keep in mind that by turning off real-time protection you’ll keep your system vulnerable, so don’t visit any suspicious websites while the real-time protection is off.
Solution 6 – Run Windows Update Troubleshooter
If you can’t update your system due to 0x800703f1 error, the issue might be related to your system. Fortunately, Windows 10 comes with various troubleshooters that can fix common problems on your PC with ease.
There’s even a special Windows Update troubleshooter that you can use, and in order to run it, you need to do the following:
- Open the Settings app and navigate to Update & Security section.
- From the menu on the left select Troubleshoot. In the right pane, select Windows Update and click Run the troubleshoot button.
- Now follow the instructions on the screen to complete the troubleshooter.
Once the troubleshooter is finished, check if the problem is still there.
Using Windows Troubleshooter is a nightmare? Choose a more user-friendly tool from our list!
Solution 7 – Restart all Windows Update components
According to users, sometimes this problem can be caused by Windows Update components. To fix the issue, you need to restart all Windows Update components manually.
To do this, you just need to run a couple of commands in Command Prompt. To do that, just follow these steps:
- Start Command Prompt as an administrator.
- When Command Prompt starts, run the following commands:
- net stop wuauserv
- net stop cryptSvc
- net stop bits
- net stop msiserver
- ren C:WindowsSoftwareDistribution SoftwareDistribution.old
- ren C:WindowsSystem32catroot2 Catroot2.old
- net start wuauserv
- net start cryptSvc
- net start bits
- net start msiserver
After running these commands, try to perform Windows Update again and check if the problem is still there.
Solution 8 – Perform a clean reinstall of Windows 10
In the end, if your problem is somehow still there, you should perform a clean Windows 10 install. You’ll only lose installed programs and apps, while everything else can be backed up on other partitions.
So, use already prepared USB/DVD drive and reinstall your system. We can promise you that everything will work much better.
That should wrap it up. If you have any questions or alternative workarounds, feel free to post them in the comments.
For more Windows Update workarounds, and additional info, make sure to check our Windows Update hub.
Editor’s Note: This post was originally published in March 2017 and has been since completely revamped and updated for freshness, accuracy, and comprehensiveness.
RELATED STORIES YOU NEED TO CHECK OUT:
Источник: https://windowsreport.com/windows-10-update-error-0x800703f1/
Top 5 Solutions to Fix Windows 10 Update Error 0x800703F1 and Make System Error Free!
Is your Windows 10 system throwing Update Error 0x800703F1 while the updating process? If your answer is YES then don’t worry as after reading this blog and applying the given solutions you can easily get rid of Update Error 0x800703F1.
other update errors, this error is also very irritating and annoying. You may come across with this error when you try to update your Windows 10 computer or laptop. Whenever you run Windows 10 Updater to download and install several different updates then it gets fails with the error message.
This problem is very infuriating and you can’t solve this issue using troubleshooter and startup/automatic repair. While resetting Windows Update Components, it will display the “entry point not found” or “failed to load” error message.
There are several reasons that can trigger a 0x800703F1 error and prevent your system from updating, few of the common causes are: third-party antivirus software, outdated or corrupt system drivers, corruption of system files and more.
If you are unable to fix the above-discussed issue after factory resetting your computer then don’t worry as several other solutions are available that will help you to fix the 0x800703F1 error message.
Do the clean Windows 10 installation and after it, try to update your system, but a clean installation of Windows 10 will remove or delete all the applications, data, and settings on your computer. It is suggested to take a complete backup of your system and store it in any other external hard drive.
After making a complete backup apply the blow given solutions one by one and try to update your system after applying each of the solutions.
How to perform a clean install of Windows 10?
Use another PC to create bootable Windows 10 disk/drive. If you already have bootable disks then skip the step 1 to Step 5.
Step 1: Go here and download the media creation tool by clicking on the Download tool now.
Step 2: Install the media creation tool and open it.
Step 3: Choose For another PC.
Step 4: After it follows the onscreen instructions. And then download an ISO file for Windows 10 that you can not only use to install Windows 10 butcan also burn a USB or DVD.
Step 5: Burn the ISO file to a USB.
Steps to Clean Install Windows 10
After creating the bootable USB, boot your computer and keep pressing F8 in order to access the BIOS setting and change its boot order so that it boots from a USB. After it, you need to save the changes and exit from the BIOS.
Connect the bootable USB drive that contains the Windows 10 setup and then restart your computer.
Now it will boot from the USB that you inserted, it will ask you to press any key to allow the computer to start installing Windows 10.
After it, you have to enter your language and other preferences, click on Install Windows. Obey other on-screen instructions.
Agree to the license terms and select to have a Custom installation.
Choose the partition that you want to install Windows 10 on and format it.
Click on Next and then follow the rest of the installer’s instructions.
After a fresh install of Windows 10, you will never face this kind of error.
Disable your antivirus software
If your system contains Windows Defender or any other third-party antivirus software then you need to remove or disable your antivirus program. This will help you to get rid of Windows 10 error 0x800703f1.
Try to disable the antivirus software temporarily. If you are using any third party antivirus tool then you should check their manual and disable the software.
How to Disable the Windows Defender?
Step 1: Go to the Settings app by pressing the Windows logo + I keyboard shortcut.
Step 2: Now, navigate to the Update & Security section.
Step 3: Now, go to the left pane and select Windows Security.
Step 4: After it, go to the right pane and choose Open Windows Defender Security Center.
Step 5: Again, click on the Virus & threat protection and then open Virus & threat protection settings.
Step 6: Here, you need to turn off the Real-time protection.
After disabling the Windows Defender or any other third party antivirus software now you should try to perform an update.
Also Read: [Tutorial] How to Clean Windows Computer/Laptop Manually and Automatically?
Run an SFC scan
As above said, system file corruption is the possible cause of Windows updates fail with the error code 0x800703f1.
In order to avoid this issue, it is suggested to run System File Checker. Follow below-given steps to run an SFC scan in Windows 10:
Step 1: Open the command prompt with admin privilege. To do this press the Windows logo key + X shortcut and choose Command Prompt (Admin) OR PowerShell (Admin)
Step 2: Now, you have to type sfc /scannow and then press the Enter key to run this command.
This command will take a few times to scan your system file and fix them.
Run DISM Command
If you are still unable to update your Windows 10 system after applying the System File Checker then you should run the Deployment Image Servicing and Management (DISM) tool.
Step 1: Again you have to open the command prompt with admin privilege, follow the above-given instruction to do this.
Step 2: Type DISM.exe /Online /Cleanup-image /Restorehealth and press the Enter key.
Now, wait for the DISM scan to accomplish and try to update your operating system.
Restart all Windows Update components
It is also found that Windows 10 Update Error 0x800703F1 can cause due to the Windows Update components. In order to avoid this, you should reboot all Windows Update components manually.
Follow the below given instructions:
Step 1: Open the Command Prompt as an administrator.
Step 2: After opening the command prompt, run the given commands one by one, to do this press the Enter key after each of the command:
net stop wuauserv
net stop cryptSvc
net stop bits
net stop msiserver
ren C:\Windows\SoftwareDistribution SoftwareDistribution.old
ren C:\Windows\System32\catroot2 Catroot2.old
net start wuauserv
net start cryptSvc
net start bits
net start msiserver
After executing all the above given commands, try to update your Windows 10 system again.
Conclusion
So, it is hoped that your system is now updated. After updating your system now you should scan your system via a professional PC ERROR SCANNER.
It is recommended to try this tool once and it will make your computer or laptop a new one.
Simply, download, install and then run this error repair tool on your system. This will automatically scan your entire system and scan for all types of hidden errors DLL error, Registry error and more.
Fix Windows 10 system 0x800703F1 error, get rid of Windows 10 system 0x800703F1 error, remove Windows 10 system 0x800703F1 error, solve Windows 10 system 0x800703F1 error
Источник: http://www.pcerror-fix.com/complete-guide-fix-windows-10-update-error-0x800703f1
Ошибка 0x800703f1 windows 10
В преддверии поступления Windows 8 в продажу Microsoft выпустила большое кумулятивное обновление KB2756872, чего никогда раньше не делала для клиентских операционных систем. Однако при установке обновления меня ждал неприятный сюрприз — ошибка 80073712.
Увеличить рисунок
Сегодня я расскажу о том, как победить эту и ряд других ошибок при установке обновлений Windows с помощью новой возможности обслуживания – встроенного восстановления компонентов (in-box corruption repair).
Эта запись открывает серию статей о нововведениях в обслуживании Windows. И нет, оно не имеет ничего общего с автоматическим обслуживанием с помощью планировщика. Сначала я покажу, как решил проблему с установкой обновления, а потом расскажу о технологии.
Устранение ошибок Windows Update, вызванных повреждением хранилища компонентов
В справке предыдущих ОС Microsoft для ошибки 80073712 есть описание, из которого следует, что причиной является повреждение хранилища компонентов. Для Windows Vista и Windows 7 была выпущена утилита System Update Readiness Tool (CheckSUR), призванная устранить целый ряд ошибок Windows Update.
Список исправляемых ошибок
Для исправления этих ошибок в Windows 8 и более новых ОС утилита CheckSUR не нужна, потому что все необходимое уже встроено в систему! Вы можете восстановить поврежденные компоненты с помощью командлета PowerShell (рекомендуемый способ) или утилиты DISM.exe.
Upd. 28-Jul-2015. Microsoft выпустила специальное обновление, которое привносит в Windows 7 возможность встроенного восстановления компонентов по аналогии с Windows 8+.
Этап 1 – восстановление поврежденного хранилища компонентов
Восстановление можно выполнить без установочного диска Windows, но в некоторых случаях он может вам понадобиться.
Восстановление без установочного диска
В этом случае используются файлы хранилища на локальном диске и Windows Update.
Запустите PowerShell от имени администратора и выполните команду:
Repair-WindowsImage -Online -RestoreHealth
Альтернативно, вы можете выполнить в командной строке, запущенной с правами администратора, команду:
Dism /Online /Cleanup-Image /RestoreHealth
Длительность процедуры восстановления зависит от конфигурации ПК и степени повреждения хранилища. У меня она заняла около 7 минут, а ее результат вы видите на рисунке ниже.
Увеличить рисунок
Состояние хранилища компонентов обозначается параметром Image Health State. У него Healthy означает, что с хранилищем компонентов все нормально. Для дальнейшей диагностики переходите к проверке целостности системных файлов чуть ниже ↓ Если же повреждение хранилища не исправлено, нужно попробовать сделать это с помощью установочного диска.
Восстановление с помощью установочного диска
Когда системе не удается восстановить какие-либо компоненты, вам может помочь оригинальный установочный диск.
- Щелкните правой кнопкой мыши по ISO-образу и выберите в меню Подключить. Обратите внимание на букву диска, которую получил подключенный образ.
- В PowerShell выполните команду:Repair-WindowsImage -Online -RestoreHealth -Source Е:\sources\install.wim:1
Здесь буква «E» соответствует букве подключенного образа, а цифра «1» — индексу издания в образе (в примере используется образ Windows 8 Enterprise с единственным изданием).
- По окончании процедуры убедитесь, что хранилище компонентов в порядке (Healthy).
Этап 2 – проверка целостности системных файлов
Строго говоря, этот этап не имеет отношения к восстановлению компонентов. Однако техническая поддержка Microsoft рекомендует после проверки целостности хранилища компонентов также проверить и целостность системных файлов. Для этого в командной строке, запущенной от имени администратора, выполните команду:
sfc /scannow
У меня один из файлов был поврежден, и утилита SFC успешно восстановила его.
Увеличить рисунок
Случаи, когда системе не удалось восстановить какие-либо файлы, выходят за рамки этой статьи (я разберу их в другой раз).
Этап 3 – установка обновления
Итак, две команды восстановили целостность хранилища компонентов и системных файлов. Самое время попробовать установить обновление заново.
Увеличить рисунок
Как видите, на сей раз у меня все сработало!
Что такое обслуживание Windows и зачем оно нужно
Рассказ вынесен в отдельную статью.
Преимущества встроенного восстановления компонентов Windows
Давайте сравним ключевые моменты восстановления компонентов в разных операционных системах.
Windows Vista и Windows 7
Утилита CheckSUR представляет собой набор полезных файлов, который регулярно обновляется по мере выхода новых исправлений. Таким образом, при возникновении проблем нужно скачивать утилиту заново, а между тем, сентябрьский пакет весит 350 Мб.
Но даже при таком размере в пакет не входят файлы для всех исправлений, выпущенных Microsoft (предположу, что файлов необязательных обновлений там нет). Это означает, что утилита не может устранить повреждения некоторых компонентов. И хотя обходной путь существует, он является костылем, требующим дополнительных телодвижений.
После запуска утилита распаковывает содержимое пакета в папку \Windows\CheckSUR\. Поскольку большинство файлов в пакете имеет очень небольшой размер, этот процесс получается длительным и занимает до 75-80% процентов от общего времени работы утилиты. Оставшееся время уходит на проверку компонентов и создание журнала.
И все это делается лишь ради того, чтобы восстановить манифесты и дать возможность системе обновиться…
Windows 8 и новее
Повреждение, как правило, означает пропажу манифеста или каталога. В отличие от CheckSUR, встроенная функция системы способна восстанавливать не только манифесты, но и все прочие составляющие компонентов. Это одно из важнейших преимуществ!
Кроме того:
- Все необходимые компоненты автоматически загружаются с Windows Update. С одной стороны – это самый актуальный источник компонентов, а с другой — от вас не требуется дополнительных действий.
- В дополнение к Windows Update или вместо него можно указать несколько источников компонентов, перечисляя WIM-образы в качестве параметров командной строки. Именно такой путь я описал выше для тех, кому не удастся обойтись только Windows Update. Например, если из г-сборки вырезаны необходимые компоненты, сочетание оригинального дистрибутива с Windows Update должно решить проблему.
- Windows периодически проверяет состояние компонентов в фоновом режиме и в случае неполадок помечает повреждение специальным флагом. Благодаря этому, с помощью консольных инструментов можно выполнить моментальную диагностику состояния хранилища компонентов.
Консольные средства для восстановления компонентов
Начиная с Windows 8, управление обслуживанием можно осуществлять не только с помощью утилиты DISM.exe, но и командлетов PowerShell, причем второй способ является рекомендуемым.
Я не любитель дублировать справку, но на русском языке ее пока нет. Поэтому я покажу вам основные возможности командлета Repair-WindowsImage, а для параметра Cleanup-Image утилиты DISM.exe ограничусь ссылкой на документацию.
Цель проверки (работающая система и образы)
Целью проверки может являться как установленная система, так и образ в формате WIM или VHD.
-Online
Проверяет работающую систему.
-Path
Проверяет подключенный автономный образ по указанному после параметра пути.
Проверка и восстановление хранилища
Для определения состояния и восстановления компонентов в командлете Repair-WindowsImage предусмотрены три параметра, выполняющих проверку хранилища. Результатом сканирования может быть:
- отсутствие повреждений (Healthy)
- наличие повреждений, которые можно восстановить (Repairable)
- наличие повреждений, которые нельзя восстановить (Not repairable)
Однако функции параметров отличаются.
-CheckHealth
Моментально проверяет, присутствует ли в системном реестре маркер, обозначающий повреждение. Этот маркер может появиться в процессе работы системы обслуживания.
-ScanHealth
Проверяет хранилище на предмет повреждений. Эта операция занимает больше времени, чем простая проверка маркера.
-RestoreHealth
Проверяет хранилище на предмет повреждений и выполняет их восстановление. Эта операция является самой длительной из трех.
Источник компонентов для восстановления
Чтобы восстановить компоненты, их нужно откуда-то взять. Когда источник не указан, при проверке автоматически используется локальное хранилище компонентов и Windows Update.
Этот момент нигде не задокументирован, и вы должны понимать, что при проверке автономного образа Windows из-под другого издания или версии Windows источник нужно указывать обязательно.
В обоих случаях вы можете указывать более одного источника и даже блокировать Windows Update при этом. Приведенные ниже параметры предназначены только для восстановления, и поэтому допустимы только в связке с -RestoreHealth.
-Source
В качестве источника можно использовать путь к:
- работающей системе, к которой имеется доступ по сети
- автономному образу, причем его предварительное подключение необязательно
Здесь любопытна возможность указать путь непосредственно к изданию в WIM-образе без его предварительного копирования на локальный диск и последующего подключения. Она является тайным знанием, пока не отраженным в документации 😉 Это работает благодаря функции автоматического подключения WIM, реализованной на последних стадиях разработки Windows 8.
Вы можете перечислить несколько путей через запятую. Дополнительные источники задействуются только в том случае, если в предыдущих не нашлось подходящих компонентов.
Когда в качестве источника используется WIM-образ, необходимо указать его индекс:
-Source C:\wim\install.wim:1
-LimitAccess
Блокирует доступ к Windows Update во время проверки.
Примеры команд PowerShell
Я приведу несколько примеров практического использования командлета Repair-WindowsImage с разными целями и источниками проверки. Первые два вы уже видели в начале статьи.
Восстановление хранилища работающей системы, используя локальные файлы и Windows Update в качестве источника:
Repair-WindowsImage -Online -RestoreHealth
Восстановление хранилища работающей системы, используя Windows Update и WIM-образ в качестве источников:
Repair-WindowsImage -Online -RestoreHealth -Source C:\wim\install.wim:1
Проверка хранилища автономного VHD-образа. Сначала он подключается в папку C:\mount (это происходит очень быстро), а затем выполняется проверка.
Mount-Windowsimage -ImagePath C:\vhd\Win8.vhd -Index 1 -Path C:\mount Repair-WindowsImage -Path C:\mount -ScanHealth
Восстановление хранилища автономного VHD-образа, используя в качестве источника WIM-образ. Сначала VHD подключается в папку, затем выполняется восстановление образа, после чего VHD отключается с сохранением изменений.
Mount-Windowsimage -ImagePath C:\vhd\Win8.vhd -Index 1 -Path C:\mount Repair-WindowsImage -Path C:\mount -RestoreHealth -Source C:\wim\install.wim:1 Dismount-WindowsImage -path C:\mount -Save
Результаты проверки и восстановления
Помимо результатов в консоли вы можете найти подробный отчет ближе к концу файла %WinDir%\Logs\DISM\dism.log
В первой половине приведенного фрагмента видны конкретные компоненты и результат их восстановления (успех или неудача), а во второй – сводка об операции, включая время ее выполнения.
Посмотреть отчет из журнала DISM
Как видите, у меня были повреждены 7 манифестов, относящихся языковому пакету, что и стало препятствием к установке обновления Windows. Все повреждения были исправлены.
Безусловно, этот материал не подразумевает моментального практического применения, хотя проверить состояние хранилища компонентов Windows вы можете прямо сейчас. Более того, за три года работы в Windows 7 у меня ни разу не возникало проблем с установкой обновлений.
Однако ошибки Windows Update, связанные с повреждением хранилища, вовсе не редкость, даже если судить только по форуму OSZone. Поэтому важно знать, как бороться с ними.
Мне показалось, что часть аудитории блога откровенно заскучала от серии статей о современном интерфейсе Windows 8 и приложений. Конечно, там все примитивно, никаких технических тонкостей, а главное – у некоторых людей создается ощущение, что кроме Modern UI в Windows 8 нет ничего нового. Это не так…
Я давно планировал серию записей об изменениях в обслуживании Windows, а возникшая проблема с установкой обновления лишь форсировала публикацию, заодно вынудив меня изменить порядок статей в серии.
Вам хватило технических тонкостей сегодня? 😉
Если нет, в следующей записи из этой серии вас ждет не только экскурс в историю инструментов обслуживания ОС Microsoft, но и уникальная возможность попробовать себя в роли г-сборщика Windows! Но до этого в блоге появятся записи на другие темы.
Источник: http://winerror.ru/windows-10/oshibka-0x800703f1-windows-10-2835
How to fix Windows 10 Update Error 0x800703f1 on Windows 10?
By Alexandra Bagratian | June 7, 2018 |
‘Failure is success in progress’
Albert Einstein
Although Windows 10 is the most polished and tuned operating system that Microsoft has developed so far, some of its components still leave a lot to be desired. For instance, the Windows Update feature is by all accounts prone to error, causing Win 10 users to keep bombarding tech and support forums with trenchant complaints and criticisms.
For now, let’s focus on how to get rid of Windows 10 update error 0x800703f1 since this persistent issue is the reason why you are here. To help you, we have collected a whole list of proven tips what to do when Windows updates fail with the error code 800703f1.
So, here are our top 6 ways how to fix Error Code 0x800703f1 when installing updates:
1. Use Windows Update Troubleshooter
Fortunately, Microsoft engineers are aware of the fact that Win 10 update problems spring up every now and then. That is why they have designed Windows Update Troubleshooter: this built-in tool will come in very handy if Windows updates fail with the error code 800703f1.
To run this solution, follow the instructions below:
- Press the Windows logo key + I letter key shortcut on your keyboard to open the Settings app.
- Proceed to the Update & Security section.
- Navigate to the left pane and select Troubleshoot.
- Go to the right pane and select Windows Update.
- Locate and click Run the troubleshooter button. The wizard will walk you through the troubleshooting process.
After getting the all-clear to proceed, restart your PC and see if your issue has been resolved.
2. Disable your antivirus software
Whether you use Windows Defender or a third-party security solution, your antivirus program can be behind the error 0x800703f1. To check if that is your case, you should temporarily disable your antivirus product and see if the issue persists.
If you use a non-Microsoft product, check its manual and disable the software. If this manoeuvre works, you should contact the vendor and report the issue.
If you have entrusted your PC’s safety to Windows Defender, here is how you can turn it off in Windows 10:
- Open the Settings app, using the Windows logo + I keyboard shortcut.
- Go to the Update & Security section.
- Navigate to the left pane and select Windows Security.
- Then move to the right pane and select Open Windows Defender Security Center.
- Click Virus & threat protection. Then open Virus & threat protection settings.
- Turn off Real-time protection.
After disabling Windows Defender, try to perform an update. If the error 800703f1 keeps reoccurring, proceed to the following fix. However, if the problem has been fixed, update your OS via Windows Update.
If Windows Defender is your only security tool, please be careful: we recommend you to avoid suspicious websites since your PC is vulnerable while Defender is off.
Moreover, it would be wise to add an extra layer of protection and install a powerful anti-malware tool. We advise using Auslogics Anti-Malware to keep nefarious entities out: this tool updates its database on a regular basis and is therefore able to bring down even the latest threats from the world of malware. In addition, this tool is designed to work hand in hand with your main antivirus tool without conflict or confrontation.
3. Fix your driver issues
Problematic drivers are a common cause of update issues in Windows 10. So, if you are still looking for a way how to get rid of Windows 10 update error 0x800703f1, the best course of action will be to check your drivers.
Naturally, the easiest way to do that is to employ a special tool to get the job done.
For example, you can make use of Auslogics Driver Updater – this solution will scan all your drivers in just one click and update them to the latest manufacturer-recommended versions that are compatible with your operating system. As a result, you will be able to enjoy a fast and stable computer.
Nevertheless, you can resolve your driver problems yourself – notably, this option requires more time and effort. However, it is up to you to decide how to get your problematic drivers back on track. That is why we have prepared the necessary instructions for you.
To start with, updating your drivers via Device Manager may prove successful under the circumstances in question.
Here is what you are supposed to do:
- Locate the Start icon on your taskbar (the Windows logo icon) and right-click on it.
- Locate Device Manager and click on it.
- Select the device which driver you wish to update.
- Right-click on the device and select Update driver software.
- Configure Device Manager to search for new drivers online.
You should carry out the procedures above for every piece of hardware which driver needs updating. Unfortunately, Device Manager may fail to find the versions needed, so be ready to update your drivers manually. Bear in mind that this method is exceptionally time consuming and should be carried out with utmost precision – you may end up installing a wrong driver and damaging your operating system.
To update your drivers manually, make sure you know the exact model of your device and what particular driver is needed for your piece of hardware to function properly. We recommend that you start your search from the official website of the device’s manufacturer. To be precise, you should search the support section for the necessary software. Reboot your PC after installing new drivers and check for the error 0x800703f1.
In a situation when the 0x800703f1 issue persists, you might need to roll back your current drivers: chances are they are incompatible with your system. To do that in Windows 10, use the following guide:
- Right-click on your Windows logo icon in the taskbar.
- Select Device Manager from the list of available options.
- Find a problematic device and right-click on it.
- Select Properties from the drop-down menu.
- Navigate to the Driver tab and click Roll Back Driver.
After restoring your drivers, restart your PC and check your Windows Update center. If your updates keep getting stuck, you should navigate to the following solution.
4. Run an SFC scan
It is possible that your Windows updates fail with the error code 0x800703f1 due to missing or corrupt system files. In such a case, it is advisable to run System File Checker. This tool comes as part of your operating system and is designed to fix your system file issues in a safe and effective way.
To run an SFC scan in Windows 10, take the following steps:
- Press the Windows logo key + X shortcut on your keyboard.
- Select Command Prompt (Admin) (or PowerShell (Admin) if Command Prompt is not available) from the list of options.
- Type sfc /scannow into the Command Prompt window and press Enter.
Wait for the scan to finish – it may take a while, so be patient. On no account should you abort the process!
Once the scan is complete, exit Command Prompt, restart your computer, and check your Windows Update. No success yet? Anyway, there is no need to despair. Keep working your way down – the following fix might be your triumph.
5. Run DISM
If running System File Checker has been to no avail, it is time for you to let the Deployment Image Servicing and Management (DISM) tool have a go. This set of instructions is here to help you:
- Open Command Prompt as an administrator (use the guidelines from the previous fix).
- Input DISM.exe /Online /Cleanup-image /Restorehealth and click Enter.
- If the command above does not work, insert your installation media and run the following command: DISM.exe /Online /Cleanup-Image /RestoreHealth /Source:C:\RepairSource\Windows /LimitAccess. Make sure to replace C:\RepairSource\Windows with the location of your media. Hit Enter.
Wait for the DISM scan to finish and try to update your OS. No luck so far? If so, you can resort to the nuclear option.
6. Clean install Windows 10
Performing a clean installation of Windows 10 is the last fix in line since this option is quite drastic. First and foremost, back up your important files to avoid permanent data loss. Make sure you have the installers for your third-party apps available – you will lose all your non-Microsoft software.
To give your Windows 10 a fresh start, do the following:
- Open the Settings app by clicking the Windows logo key and I key simultaneously.
- Enter Update & security and select Reset this PC.
- Click on Get started and select Remove everything.
Now you know how to fix Error Code 0x800703f1 when installing updates.
Have our tips proved useful?
We are looking forward to your ideas and comments.
Источник: https://www.auslogics.com/en/articles/windows-10-update-error-0x800703f1/
Непредвиденная ошибка при восстановлении системы 0x800703f1

Компьютеры 12 июня 2016
Наверное, не нужно говорить, что очень многим пользователям компьютеров и ноутбуков, работающих под управлением операционных систем Windows, иногда (и довольно-таки часто) после критических сбоев приходится заниматься их откатом (восстановлением из контрольной точки предыдущего состояния).
Но вот беда, у многих вызывает шок появление сообщения «непредвиденная ошибка при восстановлении системы 0xc0000022». Что же делать, ведь получается, что откатить систему невозможно? Неудивительно, что некоторые юзеры, не знающие методики исправления такой ситуации, тут же пытаются переустанавливать Windows. Вот этого делать как раз и не стоит. Можно обойтись менее кардинальными методами.
Для этого потребуется всего лишь «родной» загрузочный диск системы или что-то вроде Live CD.
Непредвиденная ошибка при восстановлении системы 0xc0000022: что это?
Для начала остановимся на самом сбое. Многие задаются вопросом о том, почему же при задании отката на стадии загрузки появляется непредвиденная ошибка при восстановлении системы 0xc0000022. Windows 7, такая всеми любимая, не единственная система, в которой может проявиться такой сбой. В «восьмерке» и «десятке» такое явление тоже не редкость.
Вообще, если рассматривать первопричины, когда система выдает сообщение о том, что произошла непредвиденная ошибка при восстановлении системы 0xc0000022, в основном здесь выделяют два основных момента: последствия воздействия вирусов и отсутствие или повреждение некоторых системных компонентов, отвечающих за откат системы. Разберем обе ситуации.
Проверка на вирусы
Как следует из вышесказанного, восстановление не работает, и, как следствие, загрузка системы невозможна даже в безопасном режиме. Для начала рекомендуется произвести комплексную проверку компьютерной системы на наличие вирусов, которые могли привести к такой ситуации.
Само собой разумеется, что штатный сканер недоступен. В этом случае следует использовать специальные утилиты с общим названием Rescue Disk, записанные на оптический диск или USB-носитель, которые осуществляют загрузку собственного интерфейса и самых необходимых программных компонентов еще до старта Windows.
Если вирусы в процессе сканирования обнаружены не будут, а система с явным упорством снова выдаст сообщение о том, что произошла непредвиденная ошибка при восстановлении системы 0xc0000022, следует перейти к следующим шагам.
Для загрузки теперь используем вышеупомянутые диски (либо установочный с «Виндой», либо Live CD).
Непредвиденная ошибка при восстановлении системы 0xc0000022: как исправить ее простейшим методом?
Итак, стартуем с диска или флешки, после чего, к примеру, в случае с «родным» диском Windows не производим инсталляцию системы, а переходим к консоли восстановления.
В принципе, можно попытаться откатить систему из соответствующего раздела, но, как показывает практика, это ни к чему не приведет, а сообщение «Непредвиденная ошибка при восстановлении системы 0xc0000022» появится снова.
Неудивительно, ведь все данные о точке отката и сохраненных параметрах находятся не на оптическом или USB-носителе, а на жестком диске компьютера или ноутбука.
Тут на помощь приходит командная строка. Вызвать ее можно из меню консоли или же использовать клавиши Shift + F10. Теперь в появившемся окне нужно прописать команду sfc /scannow и нажать клавишу ввода. Далее активируется процесс проверки, в ходе которого будут восстановлены критически важные компоненты системы, в том числе и отвечающие за откат.
Специфичные методы при повреждении загрузочной записи
Если же предыдущий способ результата не дал, по всей видимости, пользователь столкнулся с тем, что в системе повреждена главная загрузочная запись. Ее придется восстановить.
Повторяем все действия по загрузке и снова доходим до командной строки. Здесь прописываем следующие команды: сначала Bootrec.exe /FixMbr, а затем — Bootrec.exe /FixBoot. В большинстве случаев дополнительных действий не требуется.
После их успешного выполнения, о чем будет свидетельствовать сообщение на экране, можно попытаться перезапустить систему снова.
При этом, если восстановление не активируется автоматически, нужно произвести перезагрузку с вызовом меню безопасного режима, в котором используется строка загрузки последней удачной конфигурации.
Если и это не сработает, повторяем все действия, описанные выше, и к двум предыдущим командам добавляем еще одну: Bootrec.exe /RebuildBcd (она перезаписывает загрузочный сектор). После выполнения этой операции уж точно все должно запуститься без проблем.
Заключение
Остается добавить, что здесь были рассмотрены только самые действенные методы, требующие использования командной строки и загрузочного диска.
Конечно, можно попытаться исправить ситуацию и при помощи специальных утилит, рассчитанных на то, что откат был запущен непосредственно средствами работающей Windows, когда по каким-то причинам восстановление оказалось невозможным, но система все-таки хоть кое-как, но загружается.
В нашем же случае методика рассчитана исключительно на те ситуации, когда система не работает вообще.
Источник: .ru
Query failed: connection to localhost:9312 failed (errno=111, msg=Connection refused).
Источник: http://monateka.com/article/138371/
Ошибка 0x800703f1 windows 10
В преддверии поступления Windows 8 в продажу Microsoft выпустила большое кумулятивное обновление KB2756872, чего никогда раньше не делала для клиентских операционных систем. Однако при установке обновления меня ждал неприятный сюрприз — ошибка 80073712.
Источник: https://dcvesta.org/nepredvidennaya-oshibka-pri-vosstanovlenii-sistemy-0x800703f1/